
Define structure in c
C is a high-level programming language that was developed in the 1970s by Dennis Ritchie. It is widely used for developing system software, embedded systems, and applications that require high performance and low-level access to hardware. C is a procedural language, which means that it follows a step-by-step approach to solving problems.
.png "Define structure in c")
Read more:'C'Character Set
To get started with C, you first need to install a compiler on your computer. A compiler is a software program that converts the source code written in C into machine code that can be executed by the computer. There are several free and open-source compilers available, such as GCC (GNU Compiler Collection) and Clang..png)
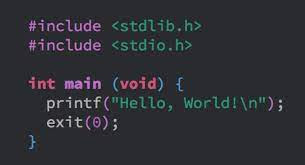
int main() {
printf("Hello World!");
return0;}
Output:
Process returned 0 (0x0) execution time : 0.011 s
Press any key to continue.
Let's break down this code:
-The first line includes the header file stdio.h, which contains the declaration of the function printf().
- The main() function is defined with a return type of int, which means that it returns an integer value.
- Inside the main() function, the printf() function is called with the argument "Hello, World!\n". This function prints the message on the screen and adds a newline character at the end.
- Finally, the main() function returns 0 to indicate that the program has executed successfully.
To compile and run this program, you need to save it with a .c extension (e.g., hello.c) and open a terminal or command prompt. Navigate to the directory where the file is saved and type the following commands:
gcc -o hello hello.c
./hello
The first command compiles the source code and generates an executable file called hello. The -o option specifies the output file name. The second command runs the program and prints the message "Hello, World!" on the screen.
Once you have mastered the basics of C programming, you can start exploring more advanced topics such as data types, arrays, pointers, functions, and structures. C also provides support for low-level programming, such as memory management and bit manipulation, which can be useful for developing system software and device drivers.
C Install IDE ?
Installing an Integrated Development Environment (IDE) for C programming can greatly enhance your coding experience and productivity. An IDE is a software application that provides a comprehensive environment for writing, debugging, and testing code. In this article, we will discuss how to install the Code::Blocks IDE for C programming on Windows.
During the installation process, you will be prompted to choose the components that you want to install. By default, all components are selected, but you can customize the installation to suit your needs. You can also choose the installation directory and create shortcuts on the desktop and Start menu.
Next, go to Settings > Editor and select the Editor settings tab. Here, you can customize the editor preferences such as font size, color scheme, and indentation settings.
To create a new C project in Code::Blocks, go to File > New > Project. Choose Console Application and click Go. Select C as the programming language and click Next. Choose a project name and location, and click Next. Finally, choose the compiler that you want to use (GNU GCC Compiler) and click Finish.
Now that you have set up your IDE, it's time to write and run your first C program. In the Code::Blocks editor, type the following code:

Step 1: Download Code::Blocks
The first step is to download the Code:: Choose the appropriate version for your operating system (32-bit or 64-bit) and download the installer. Once the download is complete, run the installer and follow the on-screen instructions.Step 2: Install Code::Blocks
Step 3: Configure Code::Blocks
After installing Code::Blocks, you need to configure it to work with C programming. Open Code::Blocks and go to Settings > Compiler. Choose the GNU GCC Compiler and click Set as Default. This will configure Code::Blocks to use the GCC compiler for compiling C programs.Next, go to Settings > Editor and select the Editor settings tab. Here, you can customize the editor preferences such as font size, color scheme, and indentation settings.
Step 4: Create a new C project
Step 5: Write and run your first C program
Now that you have set up your IDE, it's time to write and run your first C program. In the Code::Blocks editor, type the following code:
Save the file with a .c extension (e.g., hello.c) and click the Build and Run button in the toolbar. This will compile the program and run it in the console window. You should see the message "Hello, World!" printed on the screen.
In conclusion, installing an IDE for C programming can greatly simplify the coding process and improve your productivity. Code::Blocks is a popular and easy-to-use IDE that is widely used by C programmers. By following the steps outlined in this article, you can quickly set up Code::Blocks on your Windows computer and start writing C programs. Happy coding!

.png)
.png)
.png)

.png&description=Define structure in c)
0 Comments